PhotobucketPhotobucketPhotobucketPhotobucketPhotobucketPhotobucket

Tuesday, October 30, 2012

A Simple(ha ha) light Fixture Redo


Ya know when your in a store and see something fabulous that inspires you do something in your home? 
 
I have been thinking for a very long time the chandelier over my dining room table was awful, like space age, from Star Trek or something. 
 
See right?
 I've seen tutorials on making a drum shade and placing it over your existing fixture, and thought someday I will do that. 
 
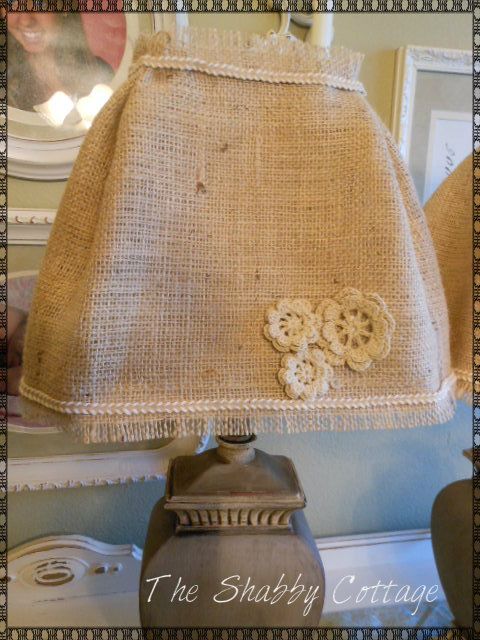
I was in Cost Plus and all lighting was 30% off.  I saw the perfect shade, it was actually a floor lamp shade so it did taper up a bit, but it was so pretty and ya know 30% off, so what's a girl to do, I bought it with the intention of just placing it over my existing fixture (like all by myself). 
 
I got it home and told my husband my idea, ya he pretty much laughed at me as he usually does at my big idea's, but after I realized it wasn't going to be that easy, and it being Sunday afternoon, and stuck at home with sick kids and the pouring rain, he's like "what else have I got to do" and so it began.
 
 I was just like take off the glass bowl looking things, and then their little silver thingies that hold them off and slip over the shade,
 
See right?
 Oh wait we're definitely going to have to take down the whole fixture from the ceiling, ya this is a little more major,
 
Well that was just the beginning.  In not too long we had no light fixture at all and we weren't even sure the whole shade thing would work.  
 
 
 After we got it down, we had take the whole thing apart.  Oh my it's totally broken now what if it doesn't work?  My cheap fix is going to turn into new chandelier that I probably won't even like because I'll be too cheap to buy what I really want. 
 
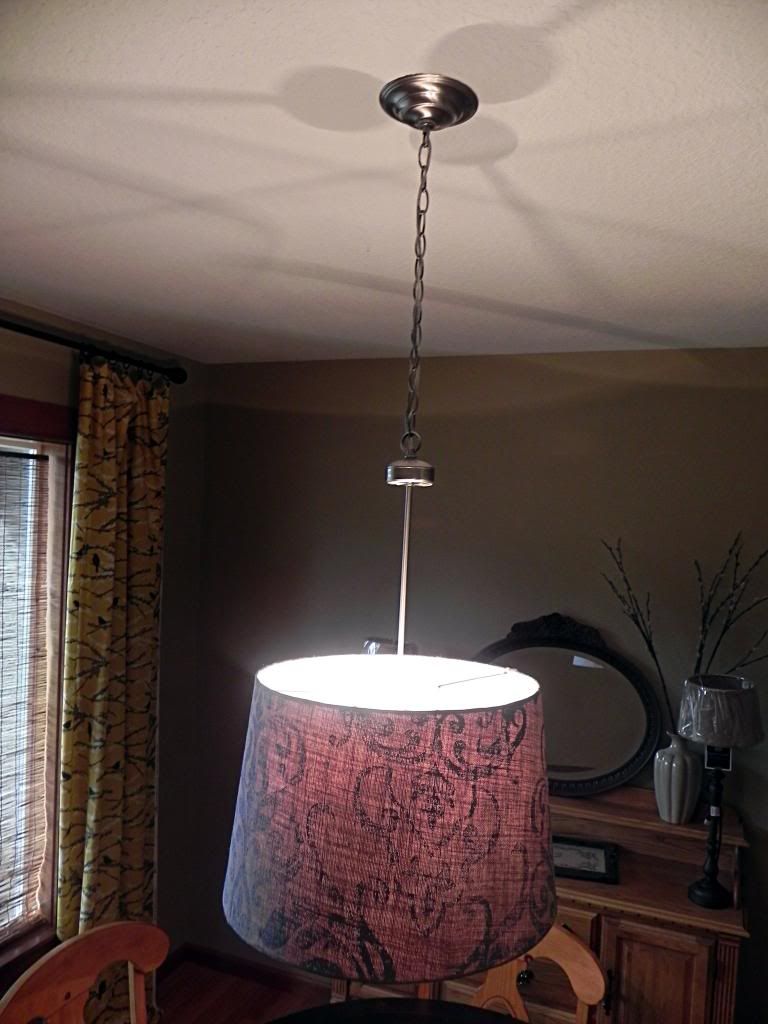
And then...suddenly(ok it wasn't so suddenly but that's how all those awe-inspiring blogs out there always make it seem so I'm just gonna go with it) 
 
Ta Da,
  What do you think so much better right?  (I'm workin' on taking better pics and photobucket wasn't helping at all), but I could not love it more, and how great is my husband, with his doubting wife along side he pretty much took the whole thing apart and put it back together, and hung it by himself (he wouldn't want me to say but he actually did it one handed) ya he's pretty amazing. 

And here is the left over parts, I had to pick up my daughter and he had it all cleaned up before I got home so I had to take a picture of  it in the garbage.

 
doesn't seem like there is something I could do with these, any creative ideas out there?
 
No more space-age chandelier, Yay!

It's not something for the cottage, but I thought it was a pretty good update (and by the way it only cost $24.50) so I thought I would share.
 

Thanks so stoppin' by!

                                                                                 Katie

Wednesday, October 24, 2012

Lamp Makeover


Hi, This is actually the first time I've posted a before and after. This is Faye. Katie, my daughter has been doing the posting up until now. I'm hoping to help her out once in a while by adding post too.

She was hoping when we started this blog that My daughters and daughter in law would all take turns each week posting but Katie has been doing all the posting.

She has four kids and a lot to do sooo I was going to try to take some of the burden off her.


I've had this lamp for a while and wanted to do something to be more in style.
One of my customers came in the shop and gave me a sample of CC Caldwell Chalk Paint in Grey.
Sooo Perfect for me to try, I already had Anne Sloan's White Chalk Paint.


I painted the whole lamp in grey , then highlighted the trim in white.
I tried antiquing it with some minwax stain ~~~ Mistake!!!
I had to repaint it.

Then I waxed it with colored wax. That did the trick, I love how it turned out.
I didn't actually take a close up picture of the base when I finished it, (first time doing a tutorial) LOL
  
Now for the old fashioned shade.
I thought a drum shade  would be simpler to cover but I have a lot of this shaped shade.
No Drum Shades!

I Measured my burlap to go all around the base of the shade, Wide enough for trim at the top and at the bottom.
I glued it all around the bottom using fabric glue but I also ended up using my glue gun.
I glued the seam closed, I started at a corner.


 Next I tacked it at each side at the top with glue.


Then came the corners. I measured ( just by sight) and tacked it in the center.
Then pleated each corner so it met in the middle of the corner. Tacking with glue as I went around.

Pleat each corner and Ta Da  all done!

But I thought it lacked something so I found some burlap trim I had and it just finished the look.


I had to go buy more trim, When I was at Joanne's Fabric and Crafts, I also found these wonderful little crocheted roses.
I think it adds a great touch!!
I Shared on The Open House Party at
No Minimalist Here
http://nominimalisthere.blogspot.com/2012/10/open-house-party_24.html

Wednesday, October 17, 2012

Simple Halloween Signs...& an Invite


    Hello, so if you happen to be in the area...consider yourself

         Invited to Our        
 
 
3rd Annual Spooktacular Evening!


October 19th ** 5:00pm ~ 8:00pm


**Spook~up Your Home For Halloween!**
30% off all Halloween Decor!!
 
 
"Treat Yourself To A Haunted Evening"!!
 
"Hot Spiced Cider and Special Treats"!
 
Spooktacular Savings ~~ Friday Night Only!!
* Enjoy 15% of Your Favorite, Most
 
Amazing, Startling, Classic, Fresh,
 
Super~Cute, Hip Item!*
 
(Excludes Furniture)
Come in Costume and get 20% off two items
 
 of your choice!! (Excludes Furniture)
 
     We would love to see you there

But if you can't make it I thought I would share a simple way to "spook up" your home on your own.


So I wanted to make some simple Halloween signs for our Annual Spooktacular Evening. 
I picked up some wood wall hangings at Goodwill, and got to work, I sanded...a lot, but if you look close you can still kinda see the old paintings or in the case of the large black one the wood burnt pictures showing through, (my husband and my son kinda cringed at painting over the buck and elk wood burning...art?  Sorry SNP from 1985).  I don't think anyone will notice so shh it's just between us. 
Next I primed, painted and distressed, then the oh so satisfying result of my Cricut words, so fun.  I totally recommend this project Goodwill has no lack of tacky painted wood plaques, and if you don't have a Cricut there's lots of tutorials on transferring words onto wood out there.  I'm saving the other pieces for some Christmas signs.

Here's the Before...

And After...


                                        Katie

Monday, October 15, 2012

Cottage White Vanity

I had a little trouble getting a vision for this vanity, after doing something a little different, like the painting on the buffet, just painting with all one color seemed a little boring, but it has so much of detail built in that I think classic cottage white was the only answer.

I did have some problems with bleeding, it was a dark cherry stain before, I used a little heavy duty primer in the spots that bled, and still some pink came through, but after distressing it didn't seem matter.

Well once again I forgot to take the before pic, but here is the after anyway:(